JavaScript WebSockets in Browser and Server with Examples
September 9, 2022
Intro
WebSockets are interesting, they are a different kind of connection than the HTTP we used. They're being used in many products like Firebase, Supabase, and DynamoDB to provide a live connection between the server and the browser/app.
One of the most popular libraries for WebSockets is Socket.io, almost every tutorial out there is using it but as a perfectionist person, I care a lot about the bundle size in the apps I build. When I took a look
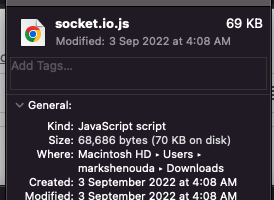
As you see, it's 69kb!!!! Yup this is a lot, especially if you know that WebSockets are natively supported in JavaScript in your browser. And from that point, I started to dive deep to know more about what are WebSockets and how they work!
What are WebSockets?
WebSockets are a protocol that allows for full-duplex communication between a client and a server. This means that both the client and the server can send messages to each other at any time. This is different from HTTP, which is a request-response protocol. In HTTP, the client sends a request to the server and the server responds to the client. In WebSockets, the client and server can send messages to each other at any time.
How WebSockets work?
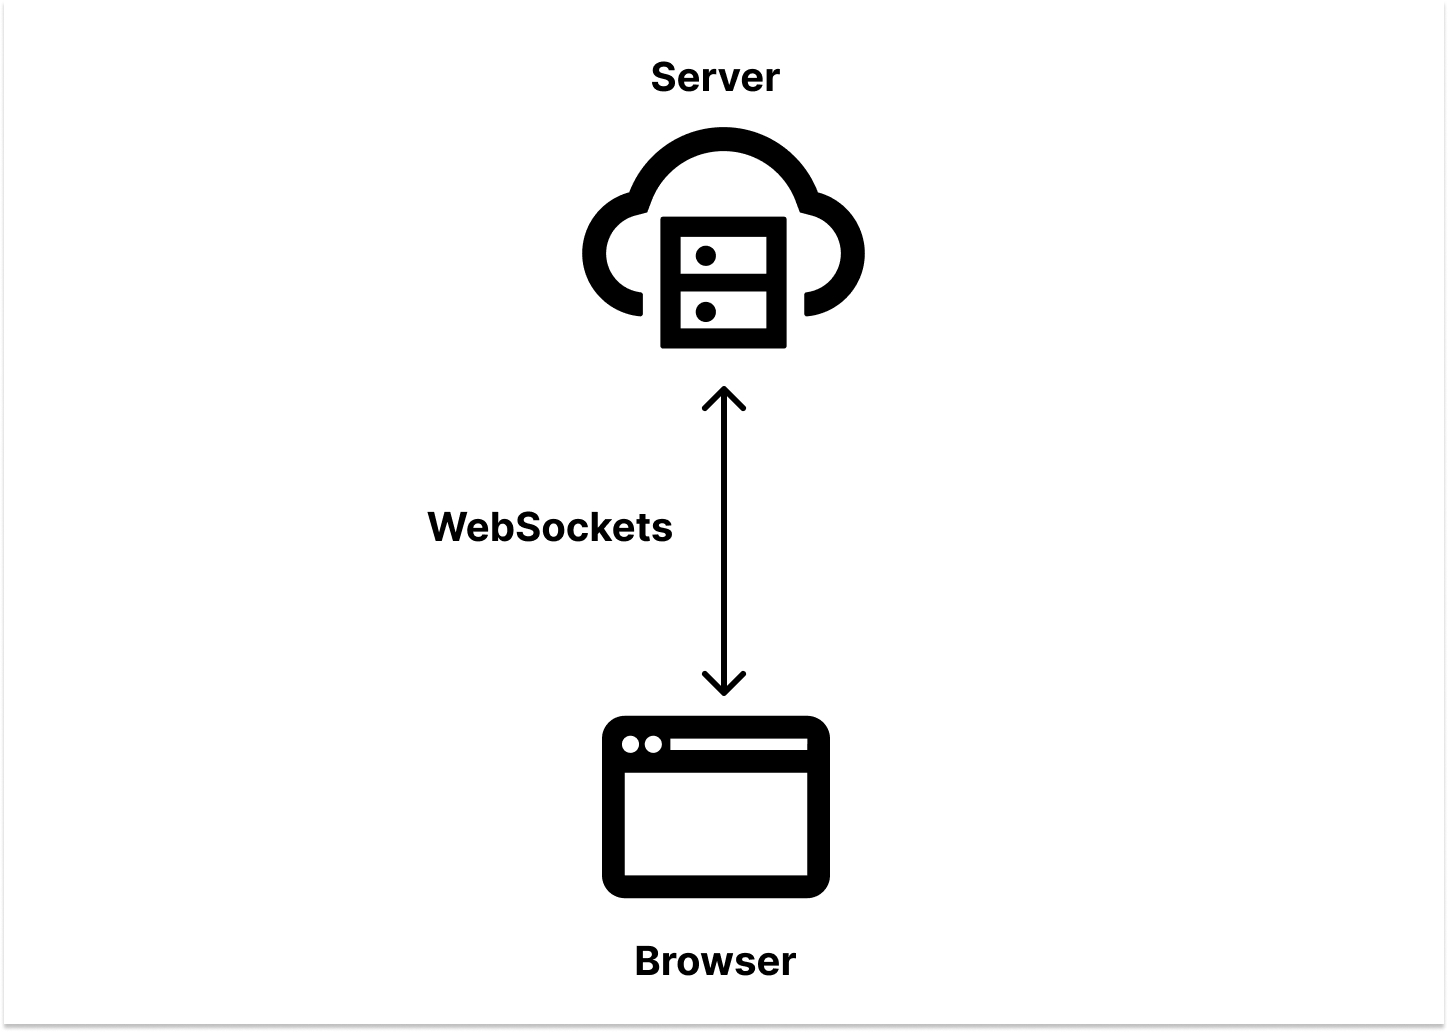
WebSockets are dual connections, they connect between 2 parties, the client and the server. The client opens a connection to the server.
Challenge with WebSockets
As I mentioned above, native WebSockets only connect 2 devices with each other, it doesn't support transferring data between multiple clients. Let me explain it with a visual example:
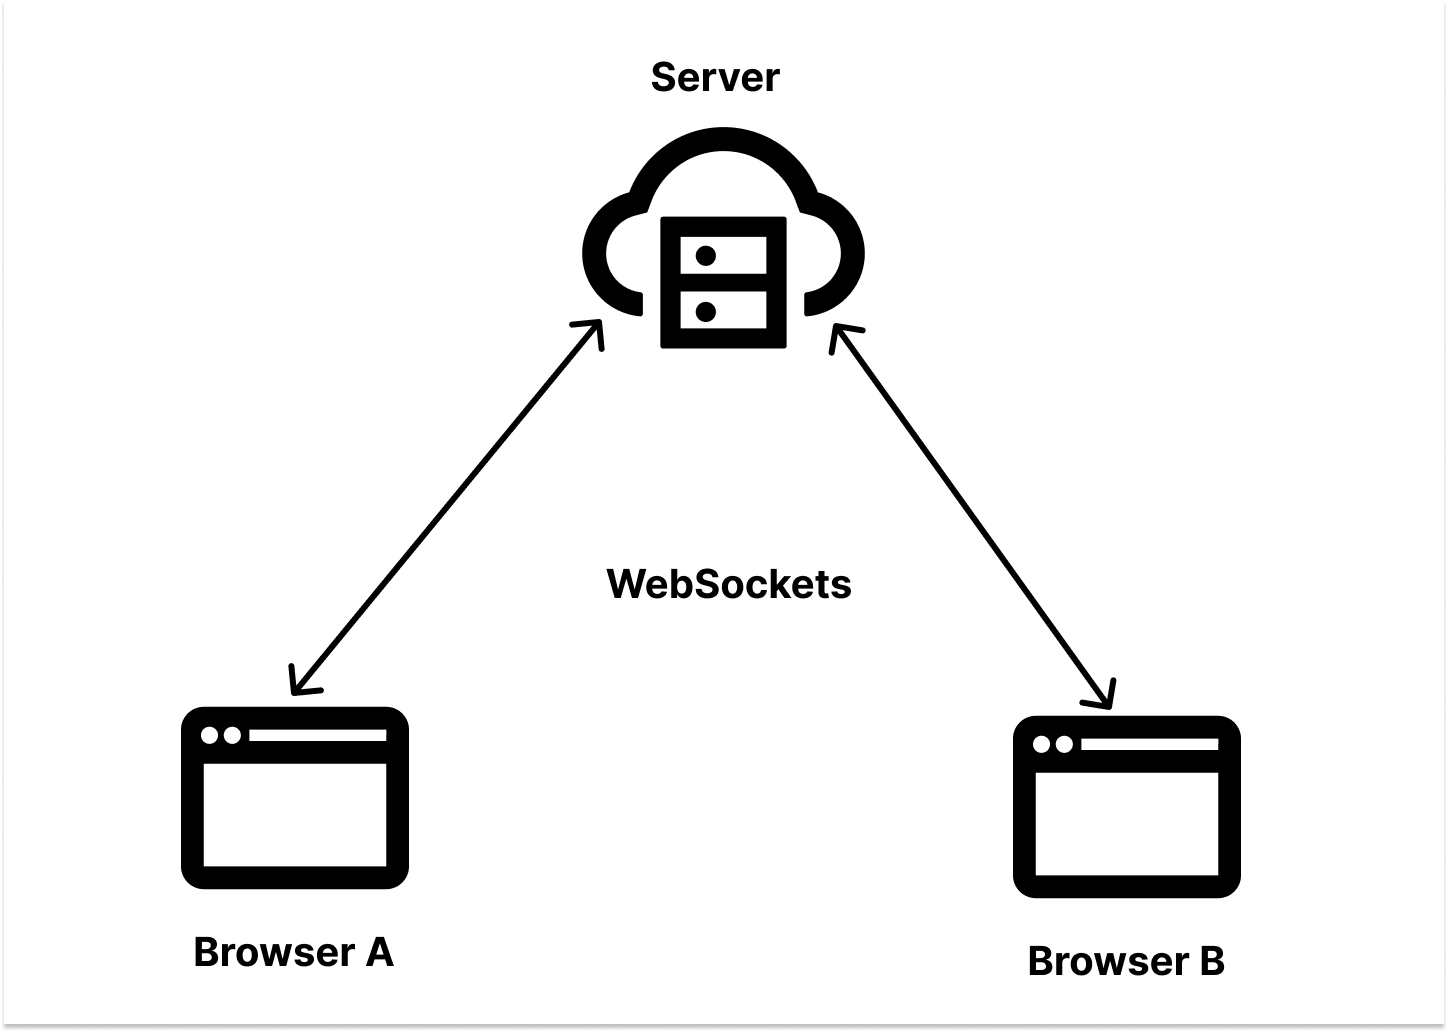
In the example above, we have one server connected to 2 browsers A and B, both browsers are connected to the same websocket on the server!
Now if browser A sends a message to the server, only the server can read the message and browser B won't receive it!
So to solve this problem we need to make a server like a router that gets the message from browser A and sends it to browser B and vice versa.
Also, if the server wants to send a message to both browsers, it has to send it to each browser separately.
Let's code
Before we begin, Here is the GitHub repo for the project, it contains the code for the server and the client.
So in this tutorial we will build a simple Express.js server with one simple HTML page that will connect to the server and send messages to each other.
Server
First, create a new folder and run npm init -y to create a new package.json file.
Then we need to install Express.js:
npm i express
Also we need to add the WebSockets module to Node.js:
npm i ws
That all packages we need for the backend.
Simple Express.js server
Let's start with a simple "Hello world!" Express.js server:
const express = require("express");
const app = express();

app.get("/", (req, res) => {
  res.send("Hello World!");
});

app.listen(3000, () => {
  console.log(`Example app listening on port 3000`);
});
Now we can run the server with node index.js and open http://localhost:3000 in the browser.

WebSockets
Now let's add WebSockets to the server, we need to import the ws module and create a new WebSocket server.
We can make it a standalone server running on a separate port like this:
const WebSocket = require("ws");

const wss = new WebSocket.Server({ port: 8080 });
Or we can make it a part of the Express.js server, I will make it a part of the Express.js server.
const express = require("express");
const app = express();
const http = require("http");
const server = http.createServer(app);
const WebSocket = require("ws");

const wss = new WebSocket.Server({ server });

app.get("/", (req, res) => {
  res.send("Hello World!");
});

app.listen(3000, () => {
  console.log(`Example app listening on port 3000`);
});
So now we have a WebSocket server running on port 3000 as a part of the Express.js server.
Front end
We will use a simple HTML page as our frontend as a very simple client, of course you can use your favorite framework like React, Vue, or Angular, but I just wanna make you focus on the WebSockets part.
I created a simple HTML page with a text input and a button to send messages to the server and some styles (feel free to steal them from my GitHub repo 😅 or make your own)
So as I mentioned before, JavaScript already has a native WebSocket API, so we can use it to connect to the server.
const socket = new WebSocket("ws://localhost:3000");
Now we can send messages to the server using the send method:
socket.send("Hello from the browser!");
And we can listen to messages from the server using the onmessage event:
socket.onmessage = (event) => {
  console.log(event.data);
};
or using event listeners:
socket.addEventListener("message", (event) => {
  console.log(event.data);
});
Receiving messages in the server
Now we need to listen to messages from the client in the server, we can do that using the on method:
wss.on("connection", (ws) => {
  ws.on("message", (message) => {
    console.log("received: %s", message);
  });
});
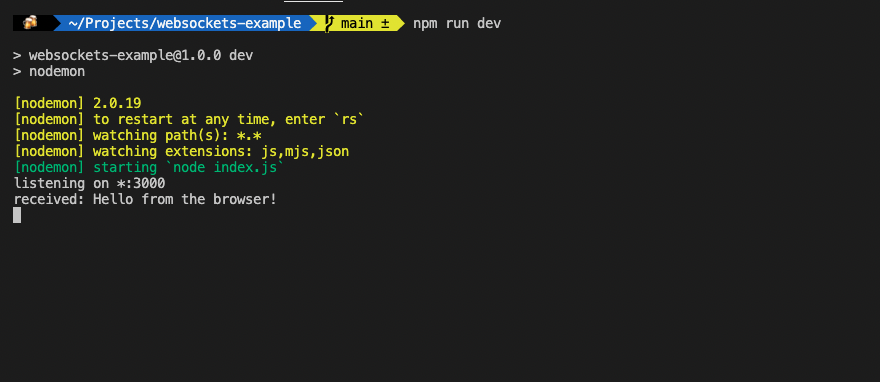
Now if we run the server and open the page in the browser, we can see the message in the server console:
Sending messages from the server
Now we need to send messages from the server to the client, we can do that using the send method:
wss.on("connection", (ws) => {
  ws.on("message", (message) => {
    ws.send(`Hello, you sent -> ${message}`);
  });
});
and we can receive these messages in the browser by listening to the onmessage event:
socket.onmessage = (event) => {
  console.log(event.data);
};
Sending messages between the clients
Now we need to send messages to all clients, we can do that using the clients method
With WebSockets we only can send messages to the same client, so we need to loop over all clients and send the message to each one except the sender.
wss.on("connection", (ws) => {
  ws.on("message", (message) => {
    wss.clients.forEach((client) => {
      if (client !== ws) {
        client.send(message, { binary: false });
      }
    });
  });
});
Note: I used the
binary: falseoption to send the message as a string, by default it will send it as a binary data.
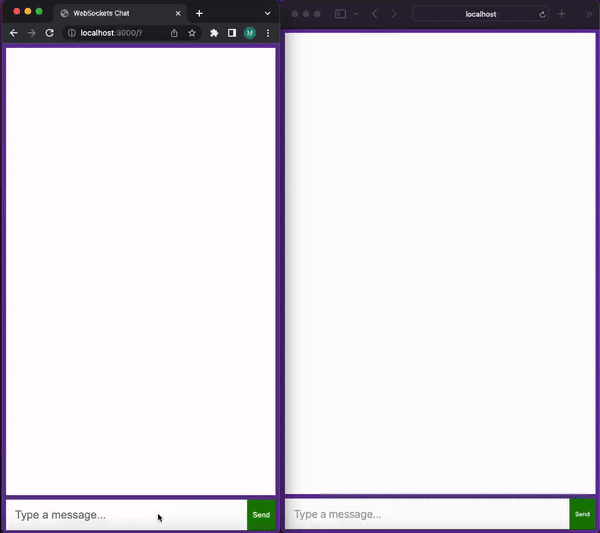
Now if we open the page in two tabs, we can see that the message is sent to both tabs:
Demo video:
Congratulations! You just built a simple chat app using WebSockets 🥳🎉
Extras
Sending messages to a specific client
If we need to send messages to a specific client, we can do that using the id property of the client.
wss.on("connection", (ws) => {
  ws.id = Math.random();
  ws.on("message", (message) => {
    wss.clients.forEach((client) => {
      if (client.id === message) {
        client.send("Hello from the server!");
      }
    });
  });
});
Sending messages to a specific group of clients (channels/rooms)
We can send messages to a specific group of clients by using for example group property of the client.
wss.on("connection", (ws) => {
  ws.group = "group1";
  ws.on("message", (message) => {
    wss.clients.forEach((client) => {
      if (client.group === message) {
        client.send("Hello from the server!");
      }
    });
  });
});
Sending messages to a specific client using the client's IP address
We can send messages to a specific client using the client's IP address, we can get the client's IP address from the socket object.
wss.on("connection", (ws, socket) => {
  ws.ip = socket.remoteAddress;
  ws.on("message", (message) => {
    wss.clients.forEach((client) => {
      if (client.ip === message) {
        client.send("Hello from the server!");
      }
    });
  });
});
Conclusion
In this article, we learned how to use WebSockets in the browser and the server, we built a simple chat app using WebSockets.
I hope you enjoyed this article, if you have any questions or suggestions, please leave a comment below.